5 posts tagged with "longhorn"

View All Tags

· 4 min read
Vicente Cheng

Filesystem trim is a common way to release unused space in a filesystem. However, this operation is known to cause IO errors when used with Longhorn volumes that are rebuilding. For more information about the errors, see the following issues:

important

Filesystem trim was introduced in Longhorn v1.4.0 because of Issue 836.

Longhorn volumes affected by the mentioned IO errors can disrupt operations in Harvester VMs that use those volumes. If you are using any of the affected Harvester versions, upgrade to a version with fixes or follow the instructions for risk mitigation in this article.

Affected Harvester versions: v1.2.0 (uses Longhorn v1.4.3), v1.2.1 (uses Longhorn v1.4.3), and v1.3.0 (uses Longhorn v1.6.0)

Harvester versions with fixes: v1.2.2 (uses Longhorn v1.5.5) and v1.3.1 (uses Longhorn v1.6.2)

Risks Associated with Filesystem Trim

A consequence of the IO errors caused by filesystem trim is that VMs using affected Longhorn volumes become stuck. Imagine the VM is running critical applications, then becomes unavailable. This is significant because Harvester typically uses Longhorn volumes as VM disks. The IO errors will cause VMs to flap between running and paused states until volume rebuilding is completed.

Although the described system behavior does not affect data integrity, it might induce panic in some users. Consider the guest Kubernetes cluster scenario. In a stuck VM, the etcd service is unavailable. The effects of this failure cascade from the Kubernetes cluster becoming unavailable to services running on the cluster becoming unavailable.

How to Check If Filesystem Trim Is Enabled

Linux

In most Linux distributions, filesystem trim is enabled by default. You can check if the related service fstrim is enabled by running the following command:

$ systemctl status fstrim.timer
● fstrim.timer - Discard unused blocks once a week
Loaded: loaded (/lib/systemd/system/fstrim.timer; enabled; vendor preset: enabled)
Active: active (waiting) since Mon 2024-03-18 03:40:24 UTC; 1 week 1 day ago
Trigger: Mon 2024-04-01 01:00:06 UTC; 5 days left
Triggers: ● fstrim.service
Docs: man:fstrim

Mar 18 03:40:24 harvester-cluster-01-pool1-49b619f6-tpc4v systemd[1]: Started Discard unused blocks once a week.

When the fstrim.timer service is enabled, the system periodically runs fstrim.

Windows

You can check if filesystem trim is enabled by running the following command:

C:\> fsutil behavior query DisableDeleteNotify
NTFS DisableDeleteNotify = 0 (Allows TRIM operations to be sent to the storage device)
ReFS DisableDeleteNotify = 0 (Allows TRIM operations to be sent to the storage device)

DisableDeleteNotify = 0 indicates that TRIM operations are enabled. For more information, see fsutil behavior in the Microsoft documentation.

Risk Mitigation

Linux

One way to mitigate the described risks is to disable fstrim services in VMs. fstrim services is enabled by default in many modern Linux distributions. You can determine if fstrim is enabled in VMs that use affected Longhorn volumes by checking the following:

  • /etc/fstab: Some root filesystems mount with the discard option.

    Example:

    /dev/mapper/rootvg-rootlv /                       xfs     defaults,discard        0 0

    You can disable fstrim on the root filesystem by removing the discard option.

    /dev/mapper/rootvg-rootlv /                       xfs     defaults        0 0   <-- remove the discard option

    After removing the discard option, you can remount the root filesystem using the command mount -o remount / or by rebooting the VM.

  • fstrim.timer: When this service is enabled, fstrim executes weekly by default. You can either disable the service or edit the service file to prevent simultaneous fstrim execution on VMs.

    You can disable the service using the following command:

    systemctl disable fstrim.timer

    To prevent simultaneous fstrim execution, use the following values in the service file (located at /usr/lib/systemd/system/fstrim.timer):

    [Timer]
    OnCalendar=weekly
    AccuracySec=1h
    Persistent=true
    RandomizedDelaySec=6000

Windows

To mitigate the described risks, you can disable TRIM operations using the following commands:

  • ReFS v2

    C:\> fsutil behavior set DisableDeleteNotify ReFS 1
  • NTFS and ReFS v1

    C:\> fsutil behavior set DisableDeleteNotify 1

· 2 min read
David Ko
Jillian Maroket

The Longhorn documentation provides best practice recommendations for deploying Longhorn in production environments. Before configuring workloads, ensure that you have set up the following basic requirements for optimal disk performance.

  • SATA/NVMe SSDs or disk drives with similar performance
  • 10 Gbps network bandwidth between nodes
  • Dedicated Priority Classes for system-managed and user-deployed Longhorn components

The following sections outline other recommendations for achieving optimal disk performance.

IO Performance

  • Storage network: Use a dedicated storage network to improve IO performance and stability.

  • Longhorn disk: Use a dedicated disk for Longhorn storage instead of using the root disk.

  • Replica count: Set the default replica count to "2" to achieve data availability with better disk space usage or less impact to system performance. This practice is especially beneficial to data-intensive applications.

  • Storage tag: Use storage tags to define storage tiering for data-intensive applications. For example, only high-performance disks can be used for storing performance-sensitive data. You can either add disks with tags or create StorageClasses with tags.

  • Data locality: Use best-effort as the default data locality of Longhorn Storage Classes.

    For applications that support data replication (for example, a distributed database), you can use the strict-local option to ensure that only one replica is created for each volume. This practice prevents the extra disk space usage and IO performance overhead associated with volume replication.

    For data-intensive applications, you can use pod scheduling functions such as node selector or taint toleration. These functions allow you to schedule the workload to a specific storage-tagged node together with one replica.

Space Efficiency

  • Recurring snapshots: Periodically clean up system-generated snapshots and retain only the number of snapshots that makes sense for your implementation.

    For applications with replication capability, periodically delete all types of snapshots.

Disaster Recovery

  • Recurring backups: Create recurring backup jobs for mission-critical application volumes.

  • System backup: Run periodic system backups.

· 7 min read
Kiefer Chang

Harvester v1.2.0 introduces a new enhancement where Longhorn system-managed components in newly-deployed clusters are automatically assigned a system-cluster-critical priority class by default. However, when upgrading your Harvester clusters from previous versions, you may notice that Longhorn system-managed components do not have any priority class set.

This behavior is intentional and aimed at supporting zero-downtime upgrades. Longhorn does not allow changing the priority-class setting when attached volumes exist. For more details, please refer to Setting Priority Class During Longhorn Installation).

This article explains how to manually configure priority classes for Longhorn system-managed components after upgrading your Harvester cluster, ensuring that your Longhorn components have the appropriate priority class assigned and maintaining the stability and performance of your system.

Stop all virtual machines

Stop all virtual machines (VMs) to detach all volumes. Please back up any work before doing this.

  1. Login to a Harvester controller node and become root.

  2. Get all running VMs and write down their namespaces and names:

    kubectl get vmi -A

    Alternatively, you can get this information by backing up the Virtual Machine Instance (VMI) manifests with the following command:

    kubectl get vmi -A -o json > vmi-backup.json
  3. Shut down all VMs. Log in to all running VMs and shut them down gracefully (recommended). Or use the following command to send shutdown signals to all VMs:

    kubectl get vmi -A -o json | jq -r '.items[] | [.metadata.name, .metadata.namespace] | @tsv' | while IFS=$'\t' read -r name namespace; do
    if [ -z "$name" ]; then
    break
    fi
    echo "Stop ${namespace}/${name}"
    virtctl stop $name -n $namespace
    done
    note

    You can also stop all VMs from the Harvester UI:

    1. Go to the Virtual Machines page.
    2. For each VM, select > Stop.
  4. Ensure there are no running VMs:

    Run the command:

    kubectl get vmi -A

    The above command must return:

    No resources found

Scale down monitoring pods

  1. Scale down the Prometheus deployment. Run the following command and wait for all Prometheus pods to terminate:

    kubectl patch -n cattle-monitoring-system prometheus/rancher-monitoring-prometheus --patch '{"spec": {"replicas": 0}}' --type merge && \
    sleep 5 && \
    kubectl rollout status --watch=true -n cattle-monitoring-system statefulset/prometheus-rancher-monitoring-prometheus

    A sample output looks like this:

    prometheus.monitoring.coreos.com/rancher-monitoring-prometheus patched
    statefulset rolling update complete 0 pods at revision prometheus-rancher-monitoring-prometheus-cbf6bd5f7...
  2. Scale down the AlertManager deployment. Run the following command and wait for all AlertManager pods to terminate:

    kubectl patch -n cattle-monitoring-system alertmanager/rancher-monitoring-alertmanager --patch '{"spec": {"replicas": 0}}' --type merge && \
    sleep 5 && \
    kubectl rollout status --watch=true -n cattle-monitoring-system statefulset/alertmanager-rancher-monitoring-alertmanager

    A sample output looks like this:

    alertmanager.monitoring.coreos.com/rancher-monitoring-alertmanager patched
    statefulset rolling update complete 0 pods at revision alertmanager-rancher-monitoring-alertmanager-c8c459dff...
  3. Scale down the Grafana deployment. Run the following command and wait for all Grafana pods to terminate:

    kubectl scale --replicas=0 deployment/rancher-monitoring-grafana -n cattle-monitoring-system && \
    sleep 5 && \
    kubectl rollout status --watch=true -n cattle-monitoring-system deployment/rancher-monitoring-grafana

    A sample output looks like this:

    deployment.apps/rancher-monitoring-grafana scaled
    deployment "rancher-monitoring-grafana" successfully rolled out

Scale down vm-import-controller pods

  1. Check if the vm-import-controller addon is enabled and configured with a persistent volume with the following command:

    kubectl get pvc -n harvester-system harvester-vm-import-controller

    If the above command returns an output like this, you must scale down the vm-import-controller pod. Otherwise, you can skip the following step.

    NAME                             STATUS   VOLUME                                     CAPACITY   ACCESS MODES   STORAGECLASS         AGE
    harvester-vm-import-controller Bound pvc-eb23e838-4c64-4650-bd8f-ba7075ab0559 200Gi RWO harvester-longhorn 2m53s
  2. Scale down the vm-import-controller pods with the following command:

    kubectl scale --replicas=0 deployment/harvester-vm-import-controller -n harvester-system && \
    sleep 5 && \
    kubectl rollout status --watch=true -n harvester-system deployment/harvester-vm-import-controller

    A sample output looks like this:

    deployment.apps/harvester-vm-import-controller scaled
    deployment "harvester-vm-import-controller" successfully rolled out

Set the priority-class setting

  1. Before applying the priority-class setting, you need to verify all volumes are detached. Run the following command to verify the STATE of each volume is detached:

    kubectl get volumes.longhorn.io -A

    Verify the output looks like this:

    NAMESPACE         NAME                                       STATE      ROBUSTNESS   SCHEDULED   SIZE           NODE   AGE
    longhorn-system pvc-5743fd02-17a3-4403-b0d3-0e9b401cceed detached unknown 5368709120 15d
    longhorn-system pvc-7e389fe8-984c-4049-9ba8-5b797cb17278 detached unknown 53687091200 15d
    longhorn-system pvc-8df64e54-ecdb-4d4e-8bab-28d81e316b8b detached unknown 2147483648 15d
    longhorn-system pvc-eb23e838-4c64-4650-bd8f-ba7075ab0559 detached unknown 214748364800 11m
  2. Set the priority-class setting with the following command:

    kubectl patch -n longhorn-system settings.longhorn.io priority-class --patch '{"value": "system-cluster-critical"}' --type merge

    Longhorn system-managed pods will restart and then you need to check if all the system-managed components have a priority class set:

    Get the value of the priority class system-cluster-critical:

    kubectl get priorityclass system-cluster-critical

    Verify the output looks like this:

    NAME                      VALUE        GLOBAL-DEFAULT   AGE
    system-cluster-critical 2000000000 false 15d
  3. Use the following command to get pods' priority in the longhorn-system namespace:

    kubectl get pods -n longhorn-system -o custom-columns="Name":metadata.name,"Priority":.spec.priority
  4. Verify all system-managed components' pods have the correct priority. System-managed components include:

    • csi-attacher
    • csi-provisioner
    • csi-resizer
    • csi-snapshotter
    • engine-image-ei
    • instance-manager-e
    • instance-manager-r
    • longhorn-csi-plugin

Scale up vm-import-controller pods

If you scale down the vm-import-controller pods, you must scale it up again.

  1. Scale up the vm-import-controller pod. Run the command:

    kubectl scale --replicas=1 deployment/harvester-vm-import-controller -n harvester-system && \
    sleep 5 && \
    kubectl rollout status --watch=true -n harvester-system deployment/harvester-vm-import-controller

    A sample output looks like this:

    deployment.apps/harvester-vm-import-controller scaled
    Waiting for deployment "harvester-vm-import-controller" rollout to finish: 0 of 1 updated replicas are available...
    deployment "harvester-vm-import-controller" successfully rolled out
  2. Verify vm-import-controller is running using the following command:

    kubectl get pods --selector app.kubernetes.io/instance=vm-import-controller -A

    A sample output looks like this, the pod's STATUS must be Running:

    NAMESPACE          NAME                                              READY   STATUS    RESTARTS   AGE
    harvester-system harvester-vm-import-controller-6bd8f44f55-m9k86 1/1 Running 0 4m53s

Scale up monitoring pods

  1. Scale up the Prometheus deployment. Run the following command and wait for all Prometheus pods to roll out:

    kubectl patch -n cattle-monitoring-system prometheus/rancher-monitoring-prometheus --patch '{"spec": {"replicas": 1}}' --type merge && \
    sleep 5 && \
    kubectl rollout status --watch=true -n cattle-monitoring-system statefulset/prometheus-rancher-monitoring-prometheus

    A sample output looks like:

    prometheus.monitoring.coreos.com/rancher-monitoring-prometheus patched
    Waiting for 1 pods to be ready...
    statefulset rolling update complete 1 pods at revision prometheus-rancher-monitoring-prometheus-cbf6bd5f7...
  2. Scale down the AlertManager deployment. Run the following command and wait for all AlertManager pods to roll out:

    kubectl patch -n cattle-monitoring-system alertmanager/rancher-monitoring-alertmanager --patch '{"spec": {"replicas": 1}}' --type merge && \
    sleep 5 && \
    kubectl rollout status --watch=true -n cattle-monitoring-system statefulset/alertmanager-rancher-monitoring-alertmanager

    A sample output looks like this:

    alertmanager.monitoring.coreos.com/rancher-monitoring-alertmanager patched
    Waiting for 1 pods to be ready...
    statefulset rolling update complete 1 pods at revision alertmanager-rancher-monitoring-alertmanager-c8bd4466c...
  3. Scale down the Grafana deployment. Run the following command and wait for all Grafana pods to roll out:

    kubectl scale --replicas=1 deployment/rancher-monitoring-grafana -n cattle-monitoring-system && \
    sleep 5 && \
    kubectl rollout status --watch=true -n cattle-monitoring-system deployment/rancher-monitoring-grafana

    A sample output looks like this:

    deployment.apps/rancher-monitoring-grafana scaled
    Waiting for deployment "rancher-monitoring-grafana" rollout to finish: 0 of 1 updated replicas are available...
    deployment "rancher-monitoring-grafana" successfully rolled out

Start virtual machines

  1. Start a VM with the command:

    virtctl start $name -n $namespace

    Replace $name with the VM's name and $namespace with the VM's namespace. You can list all virtual machines with the command:

    kubectl get vms -A
    note

    You can also stop all VMs from the Harvester UI:

    1. Go to the Virtual Machines page.
    2. For each VM, select > Start.

    Alternatively, you can start all running VMs with the following command:

    cat vmi-backup.json | jq -r '.items[] | [.metadata.name, .metadata.namespace] | @tsv' | while IFS=$'\t' read -r name namespace; do
    if [ -z "$name" ]; then
    break
    fi
    echo "Start ${namespace}/${name}"
    virtctl start $name -n $namespace || true
    done

· 4 min read
Vicente Cheng

In earlier versions of Harvester (v1.0.3 and prior), Longhorn volumes may get corrupted during the replica rebuilding process (reference: Analysis: Potential Data/Filesystem Corruption). In Harvester v1.1.0 and later versions, the Longhorn team has fixed this issue. This article covers manual steps you can take to scan the VM's filesystem and repair it if needed.

Stop The VM And Backup Volume

Before you scan the filesystem, it is recommend you back up the volume first. For an example, refer to the following steps to stop the VM and backup the volume.

  • Find the target VM.

finding the target VM

  • Stop the target VM.

Stop the target VM

The target VM is stopped and the related volumes are detached. Now go to the Longhorn UI to backup this volume.

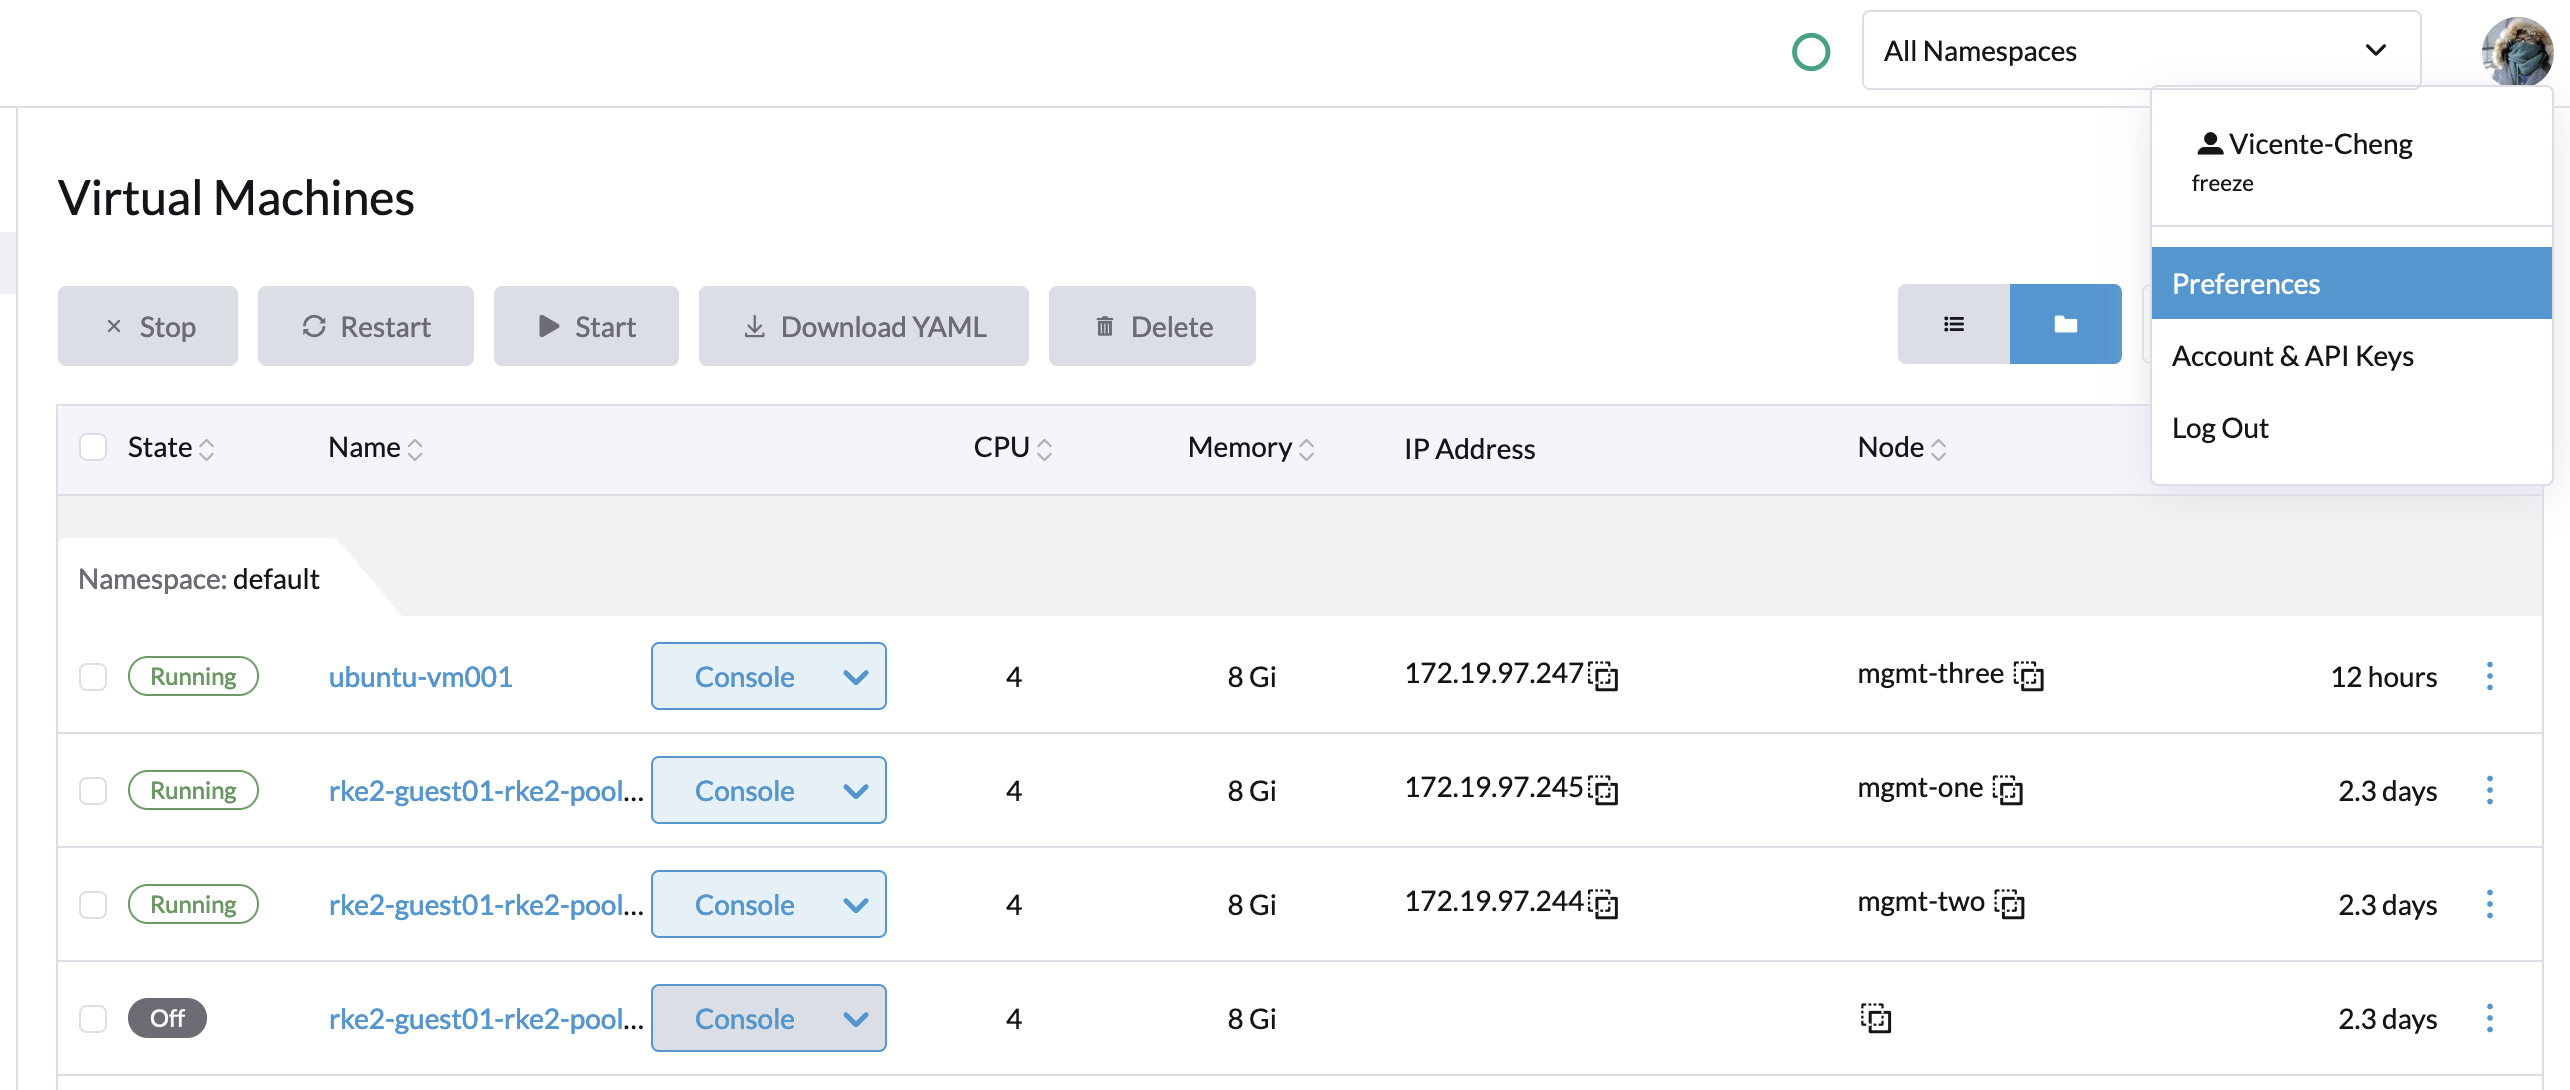
  • Enable Developer Tools & Features (Preferences -> Enable Developer Tools & Features).

Preferences then enable developer mode Enable the developer mode

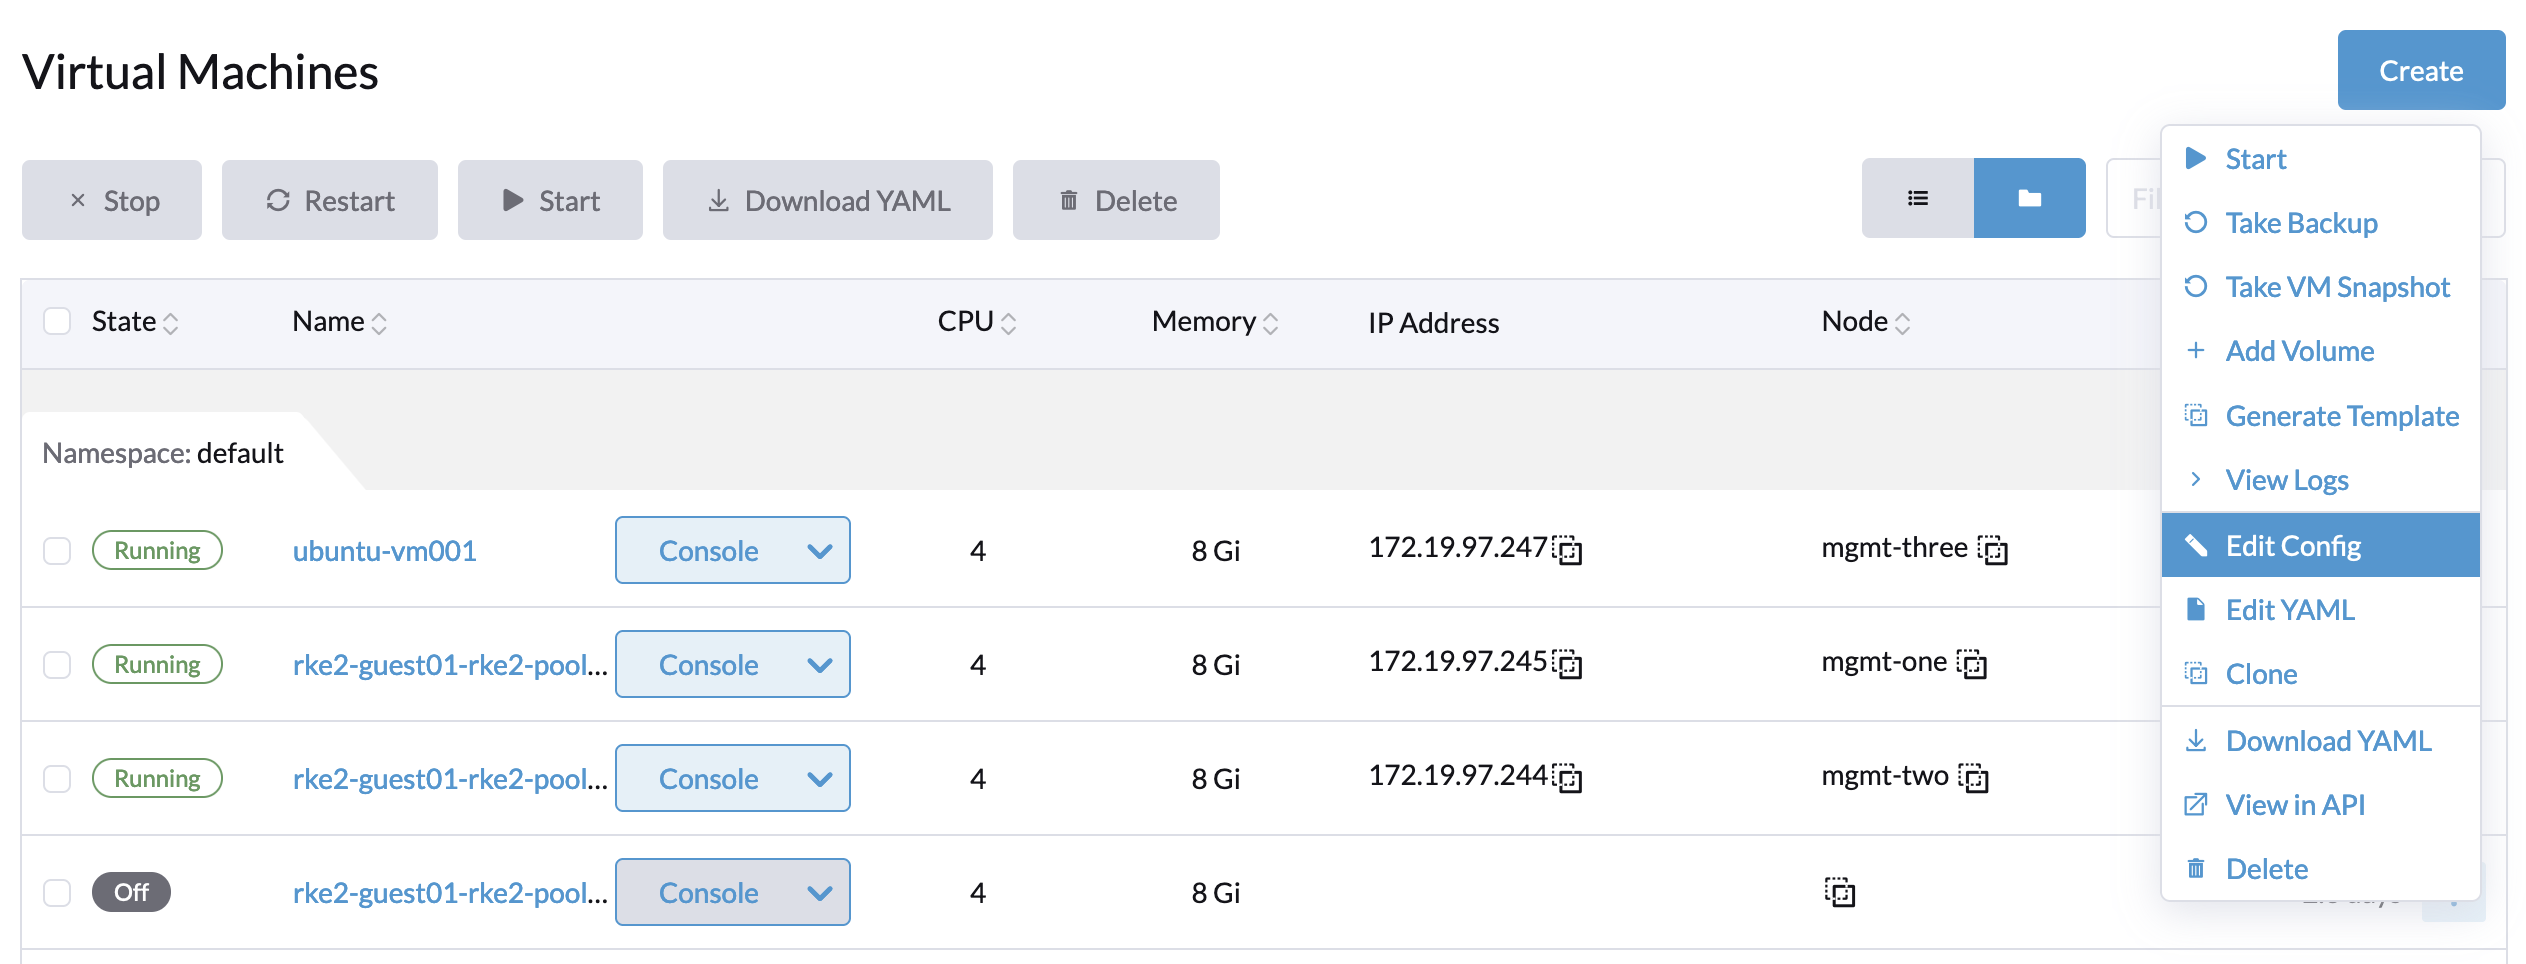
  • Click the button and select Edit Config to edit the config page of the VM.

goto edit config page of VM

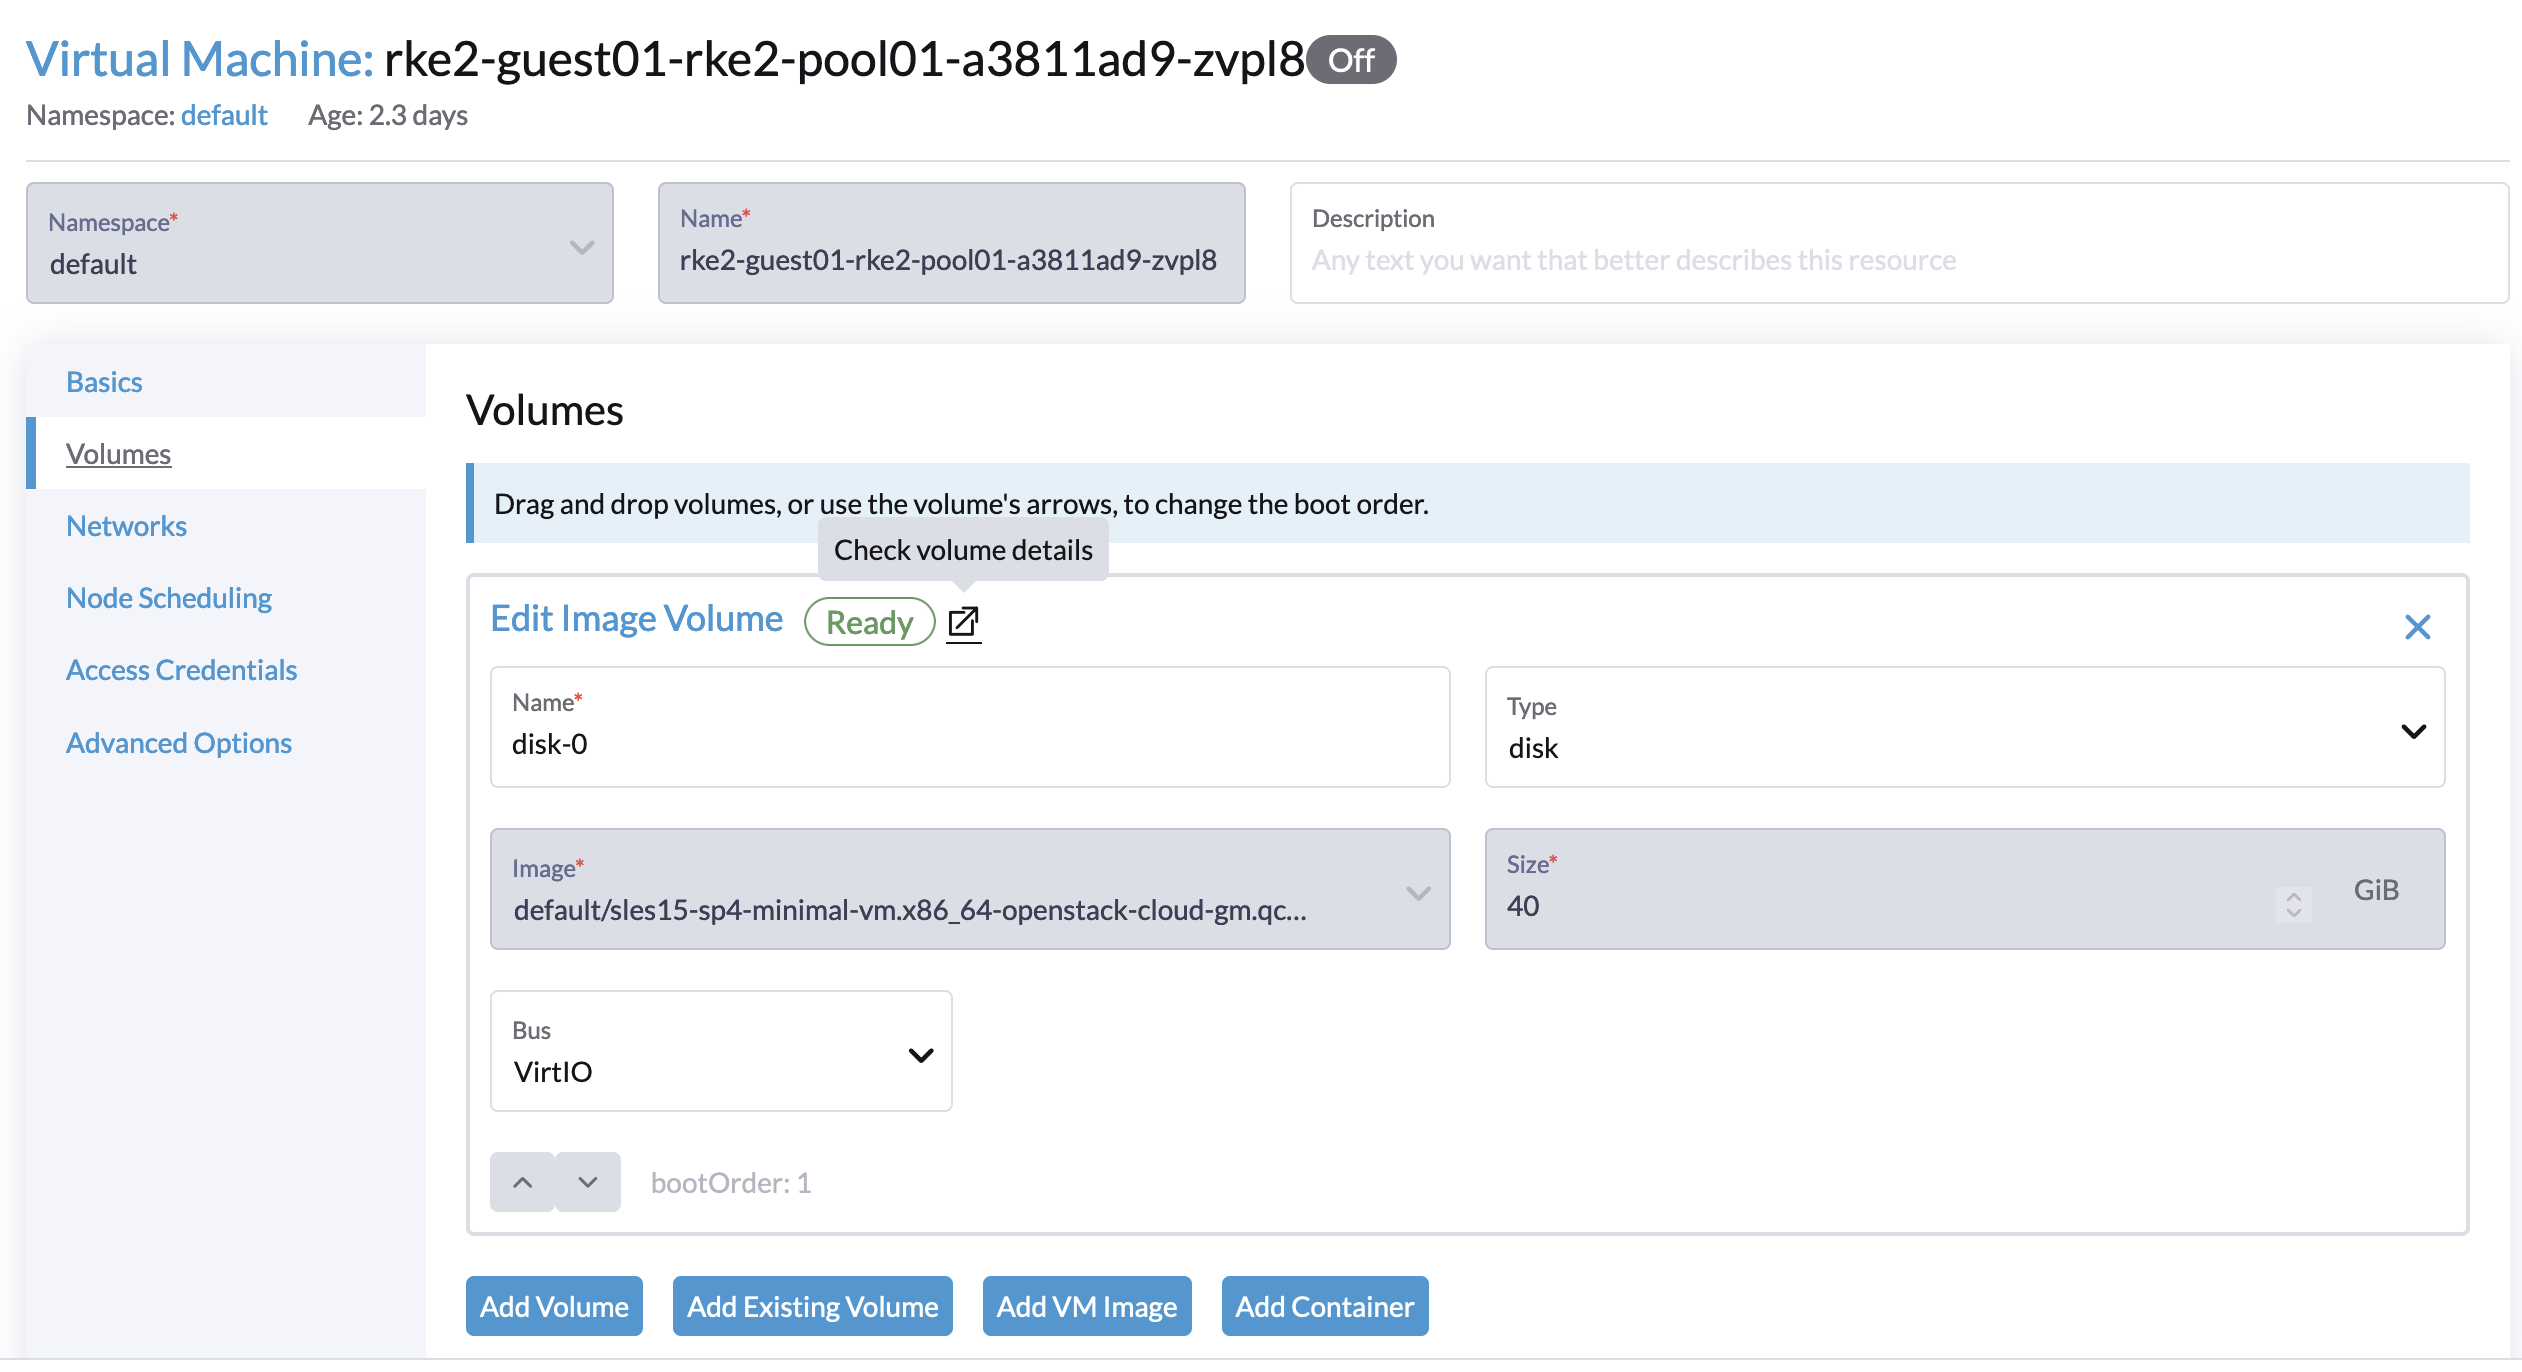
  • Go to the Volumes tab and select Check volume details.

link to longhorn volume page

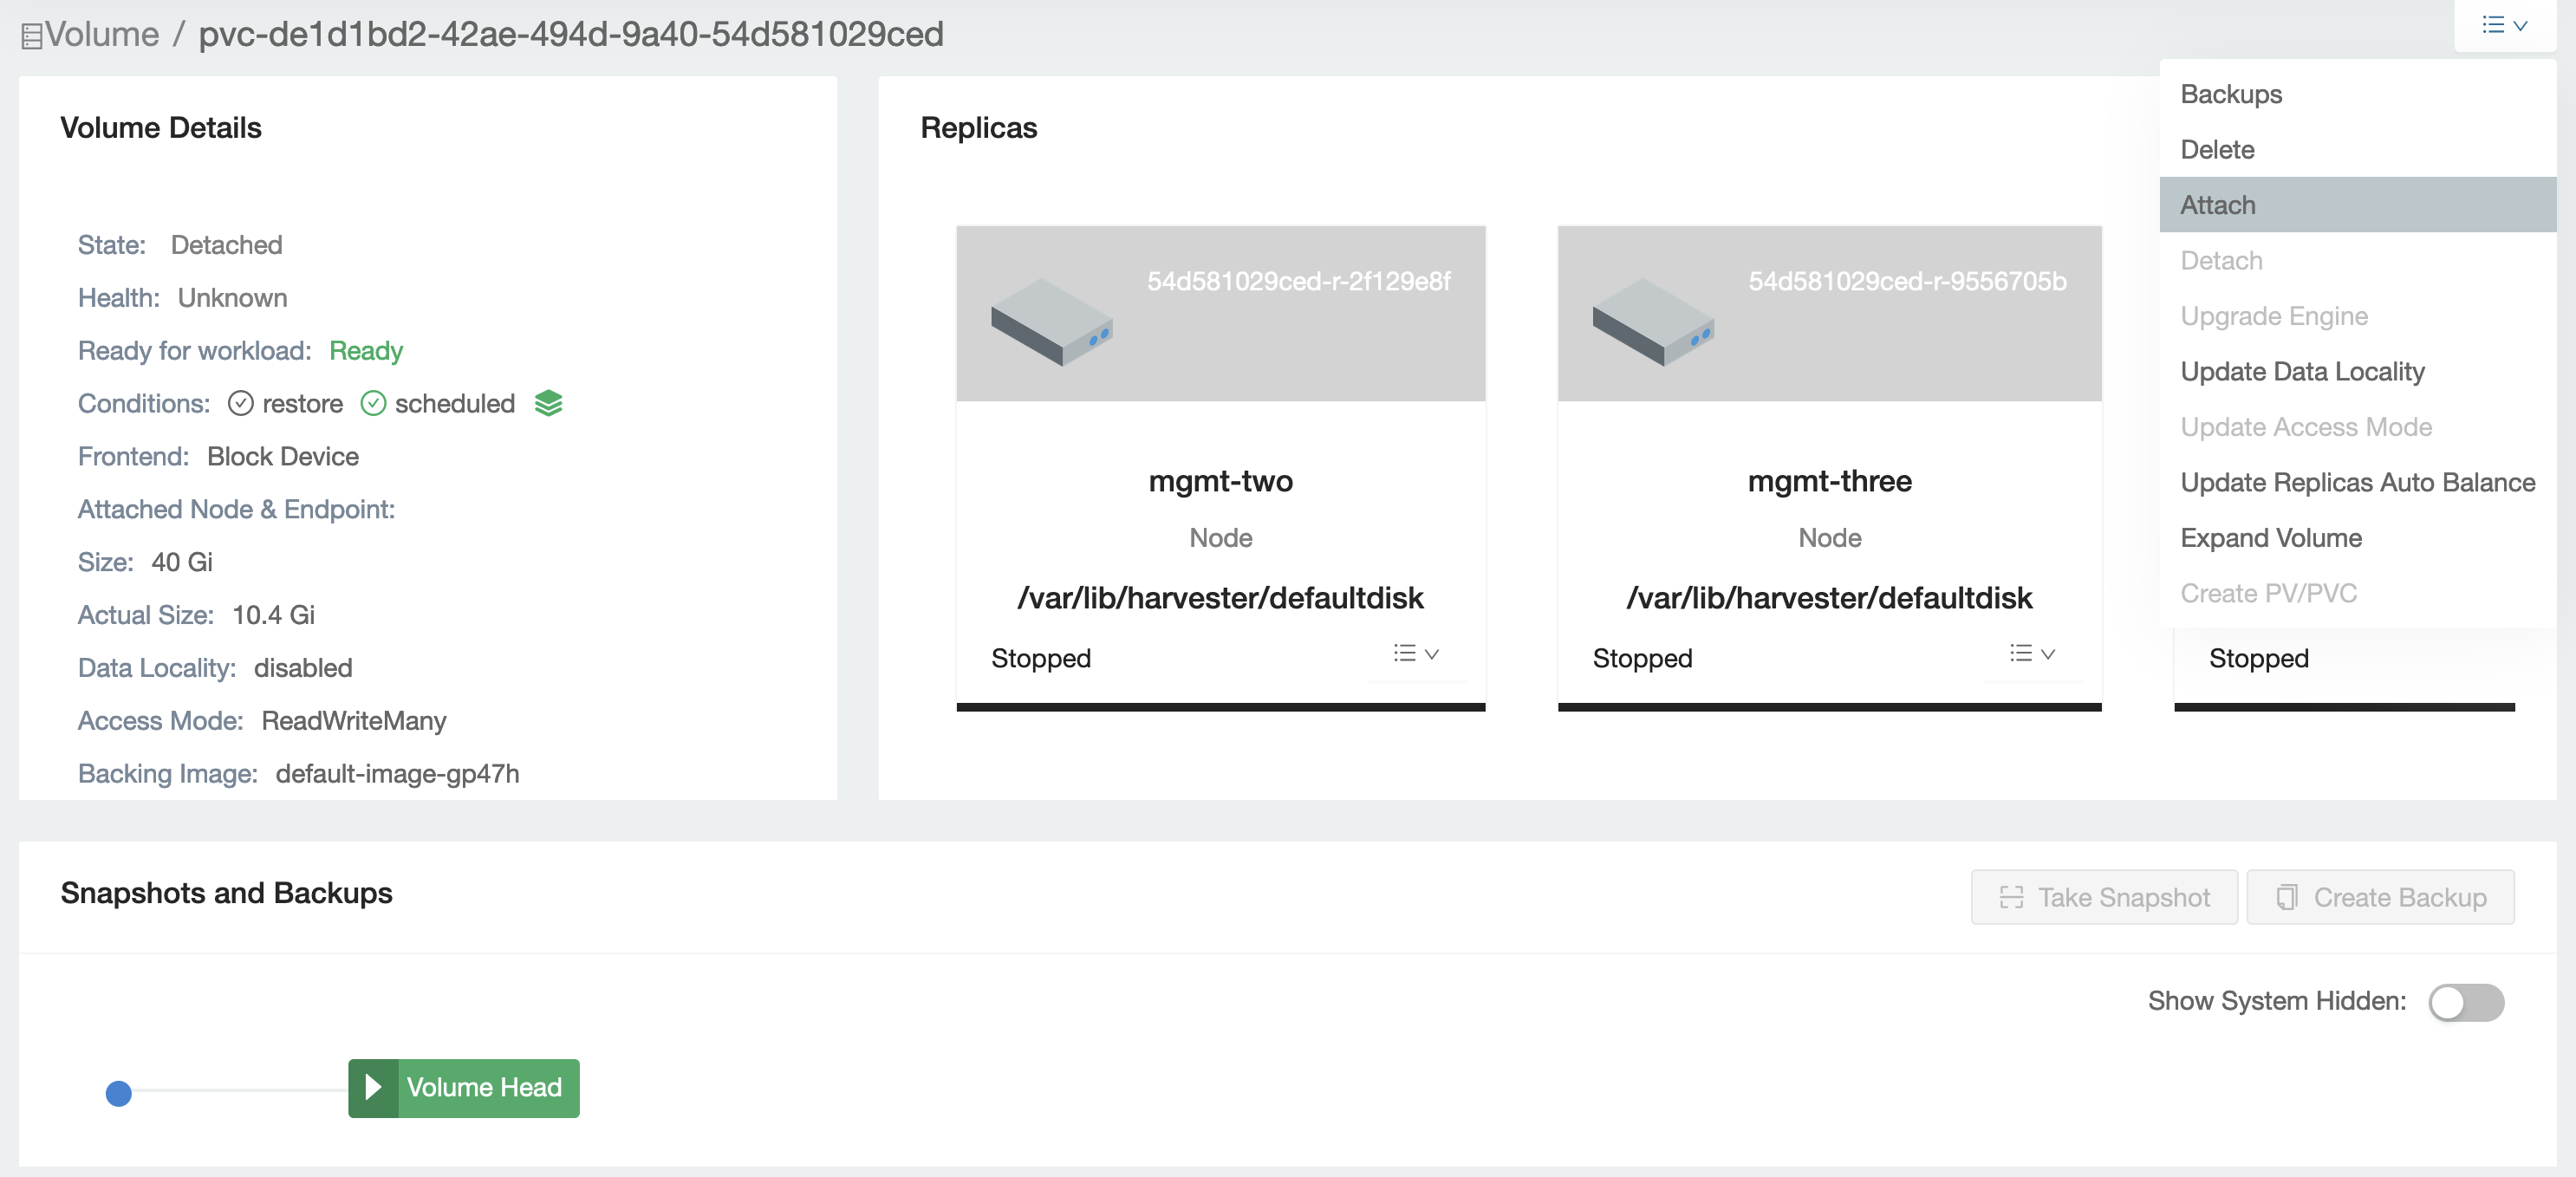
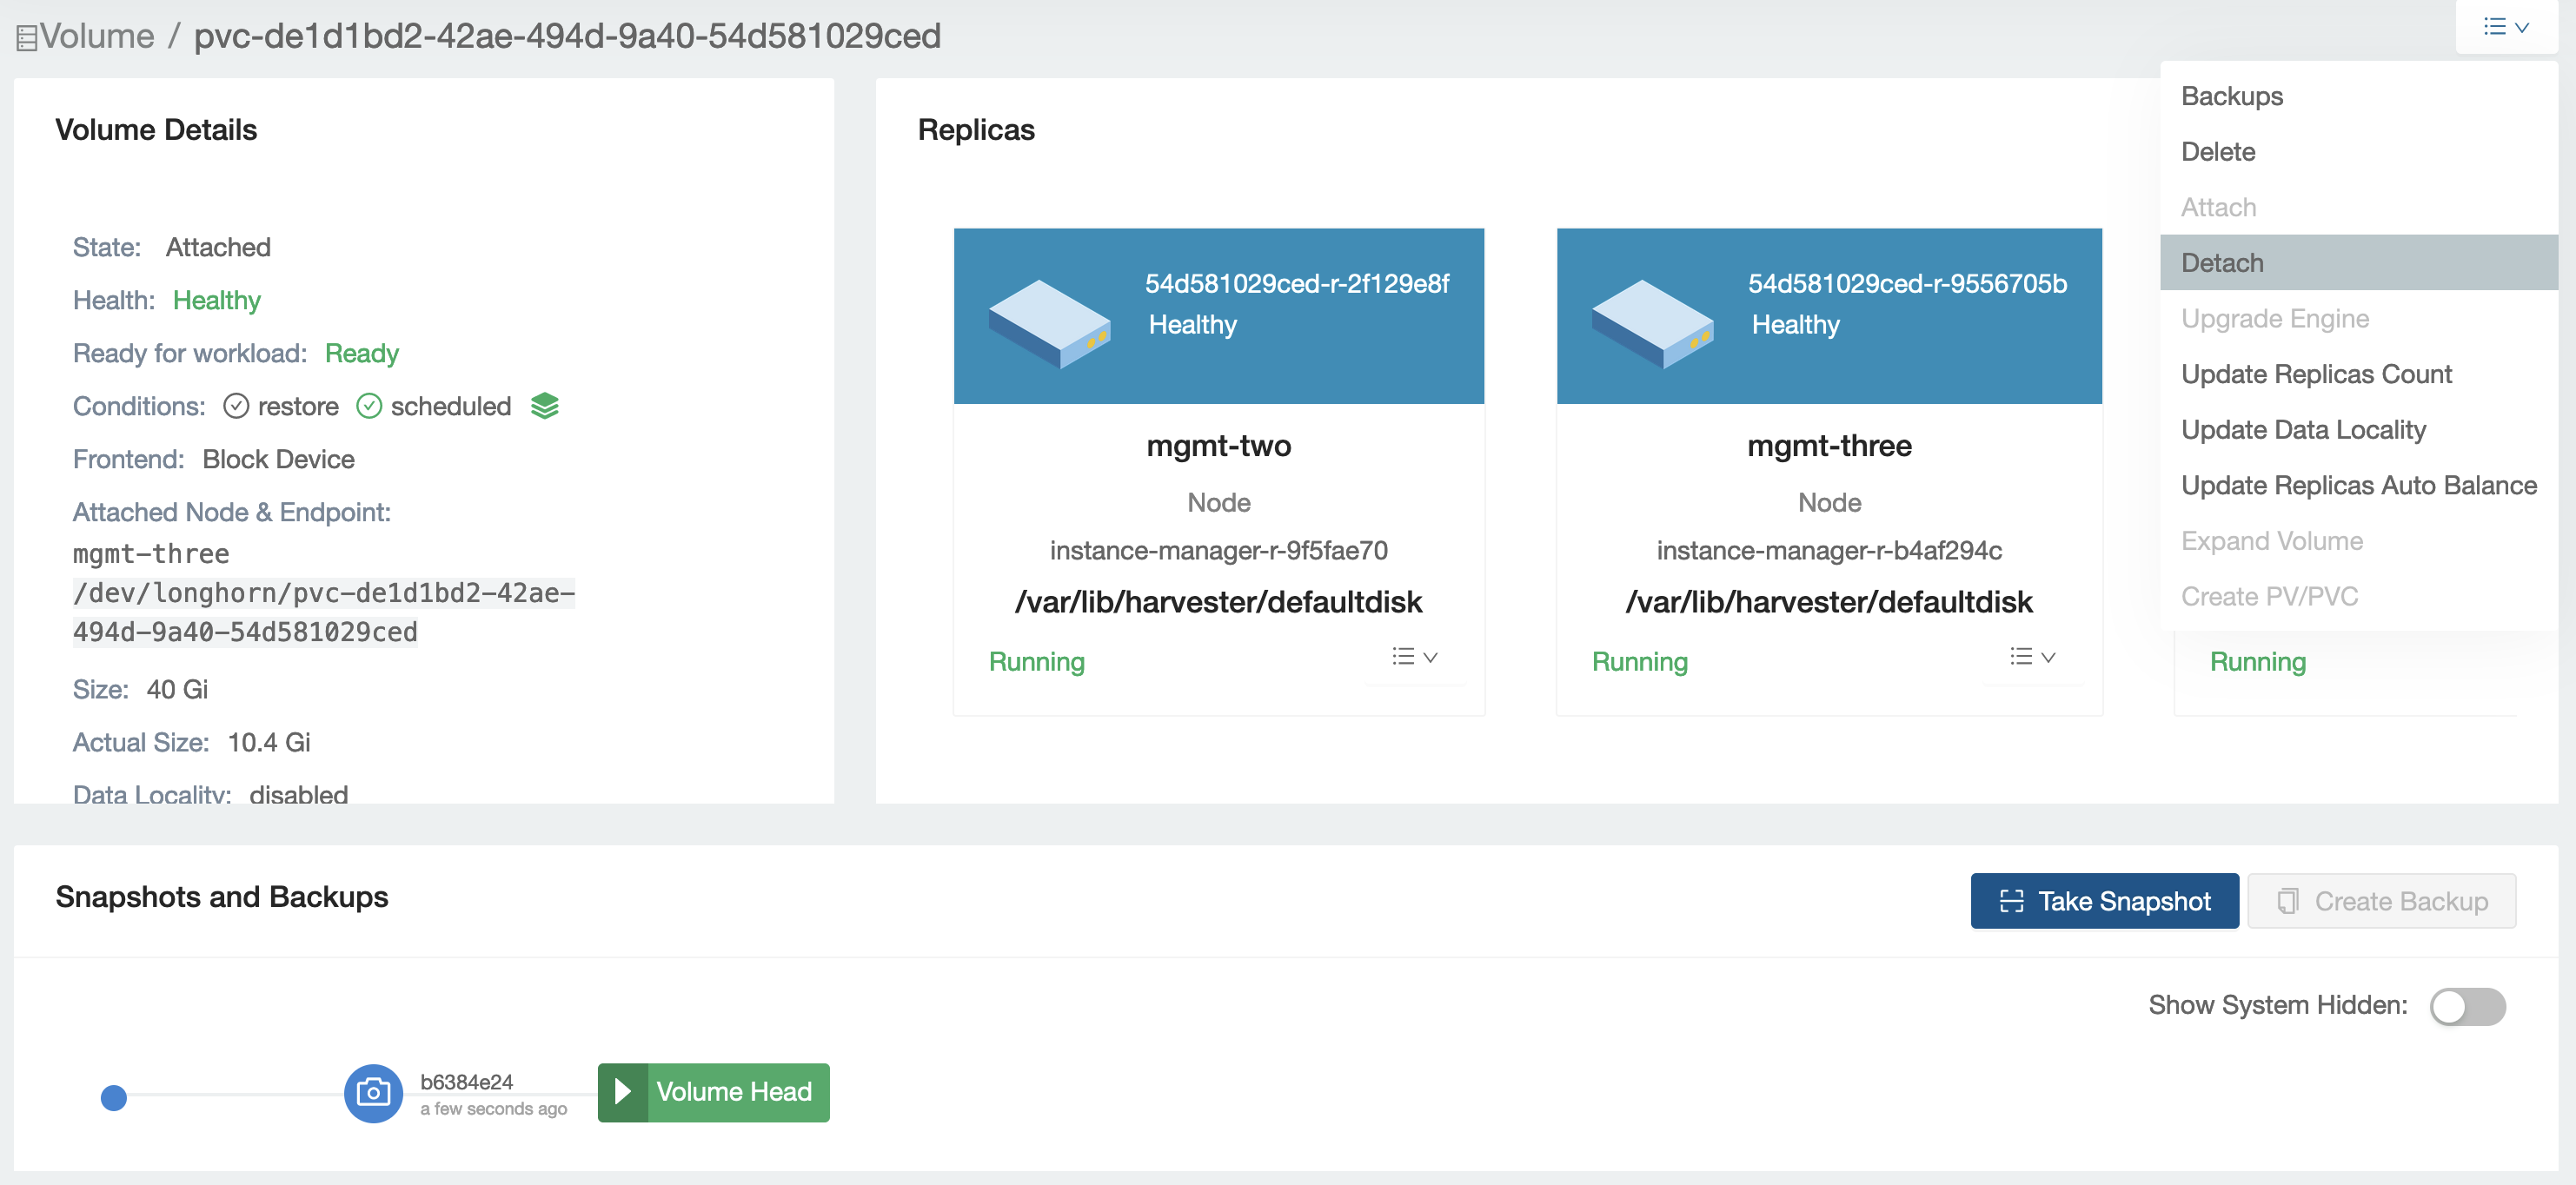
  • Click the dropdown menu on the right side and select 'Attach' to attach the volume again.

attach this volume again

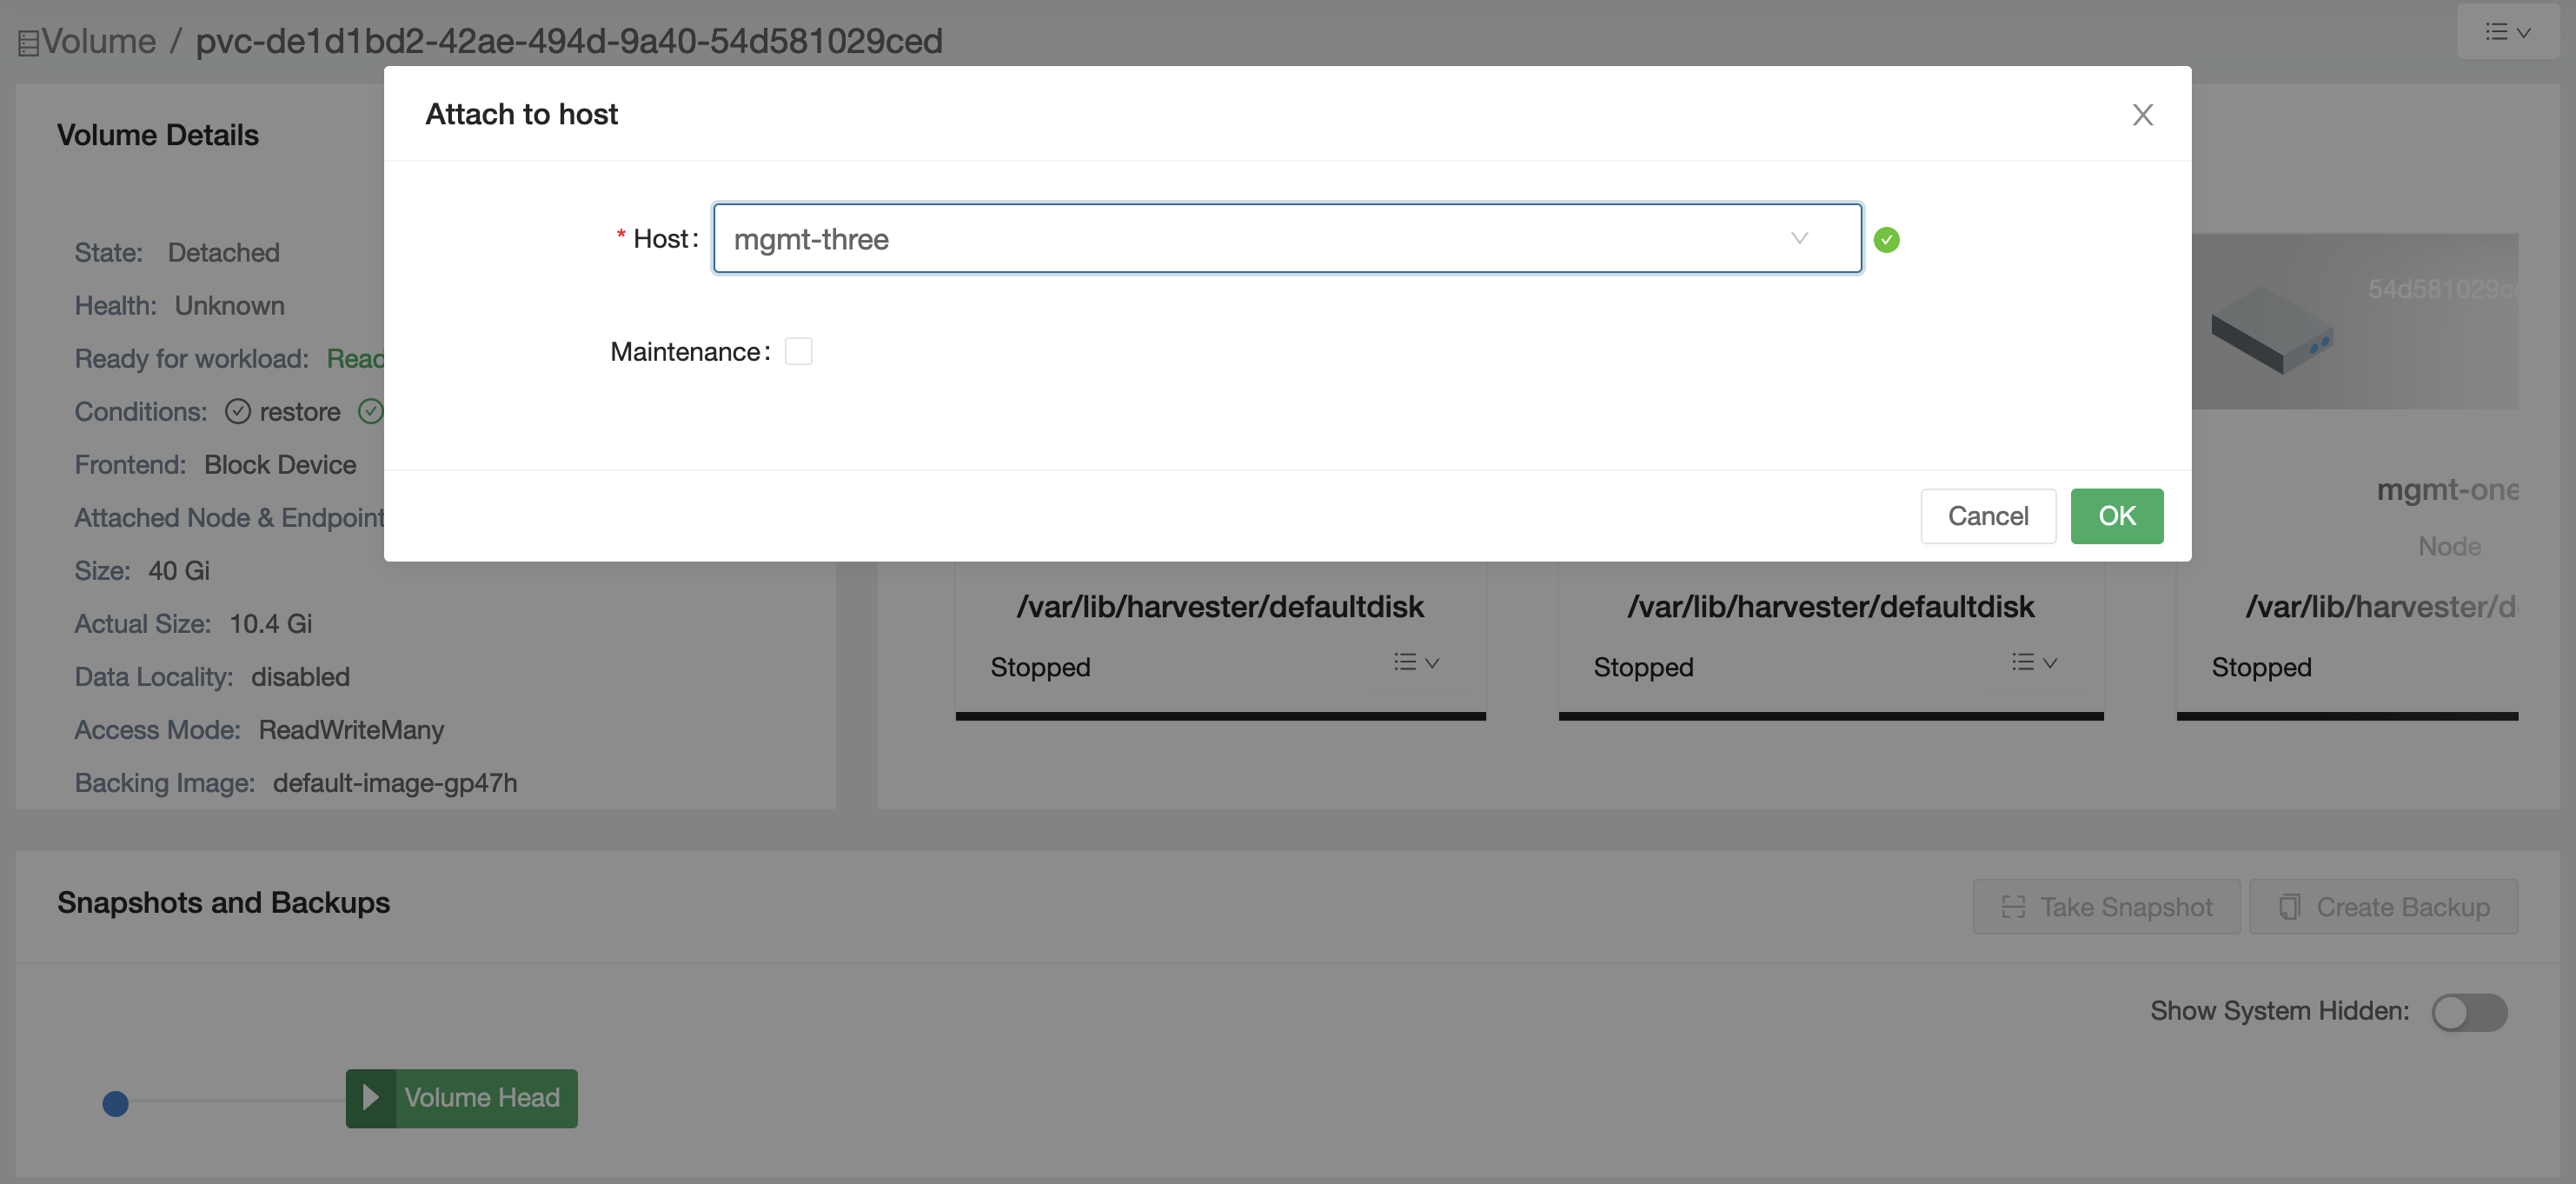
  • Select the attached node.

choose the attached node

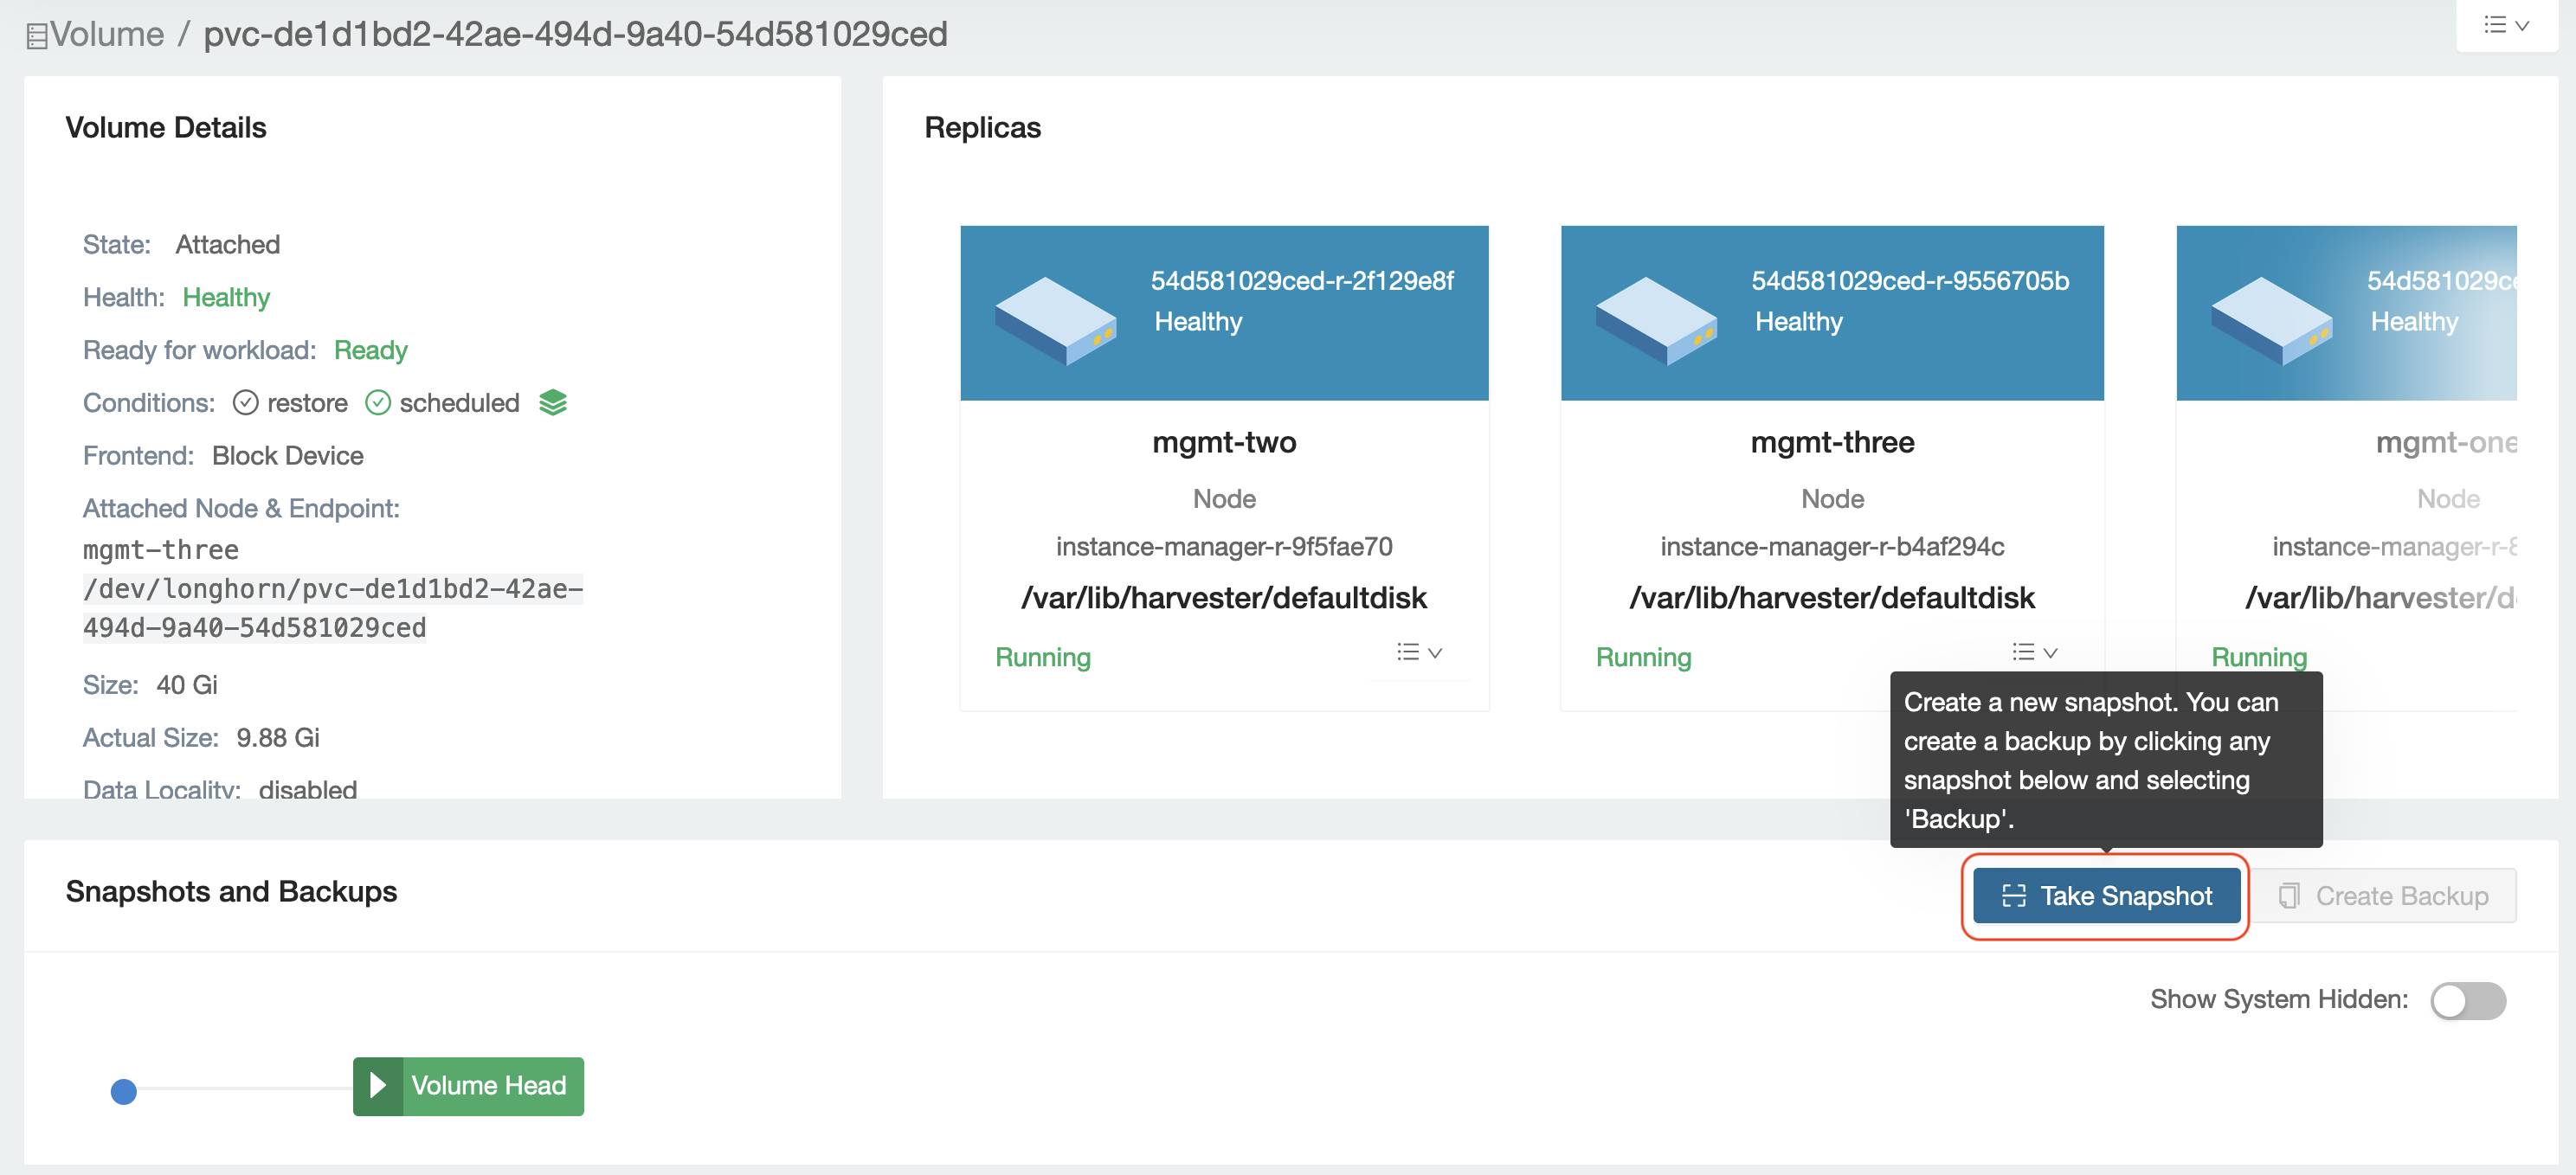
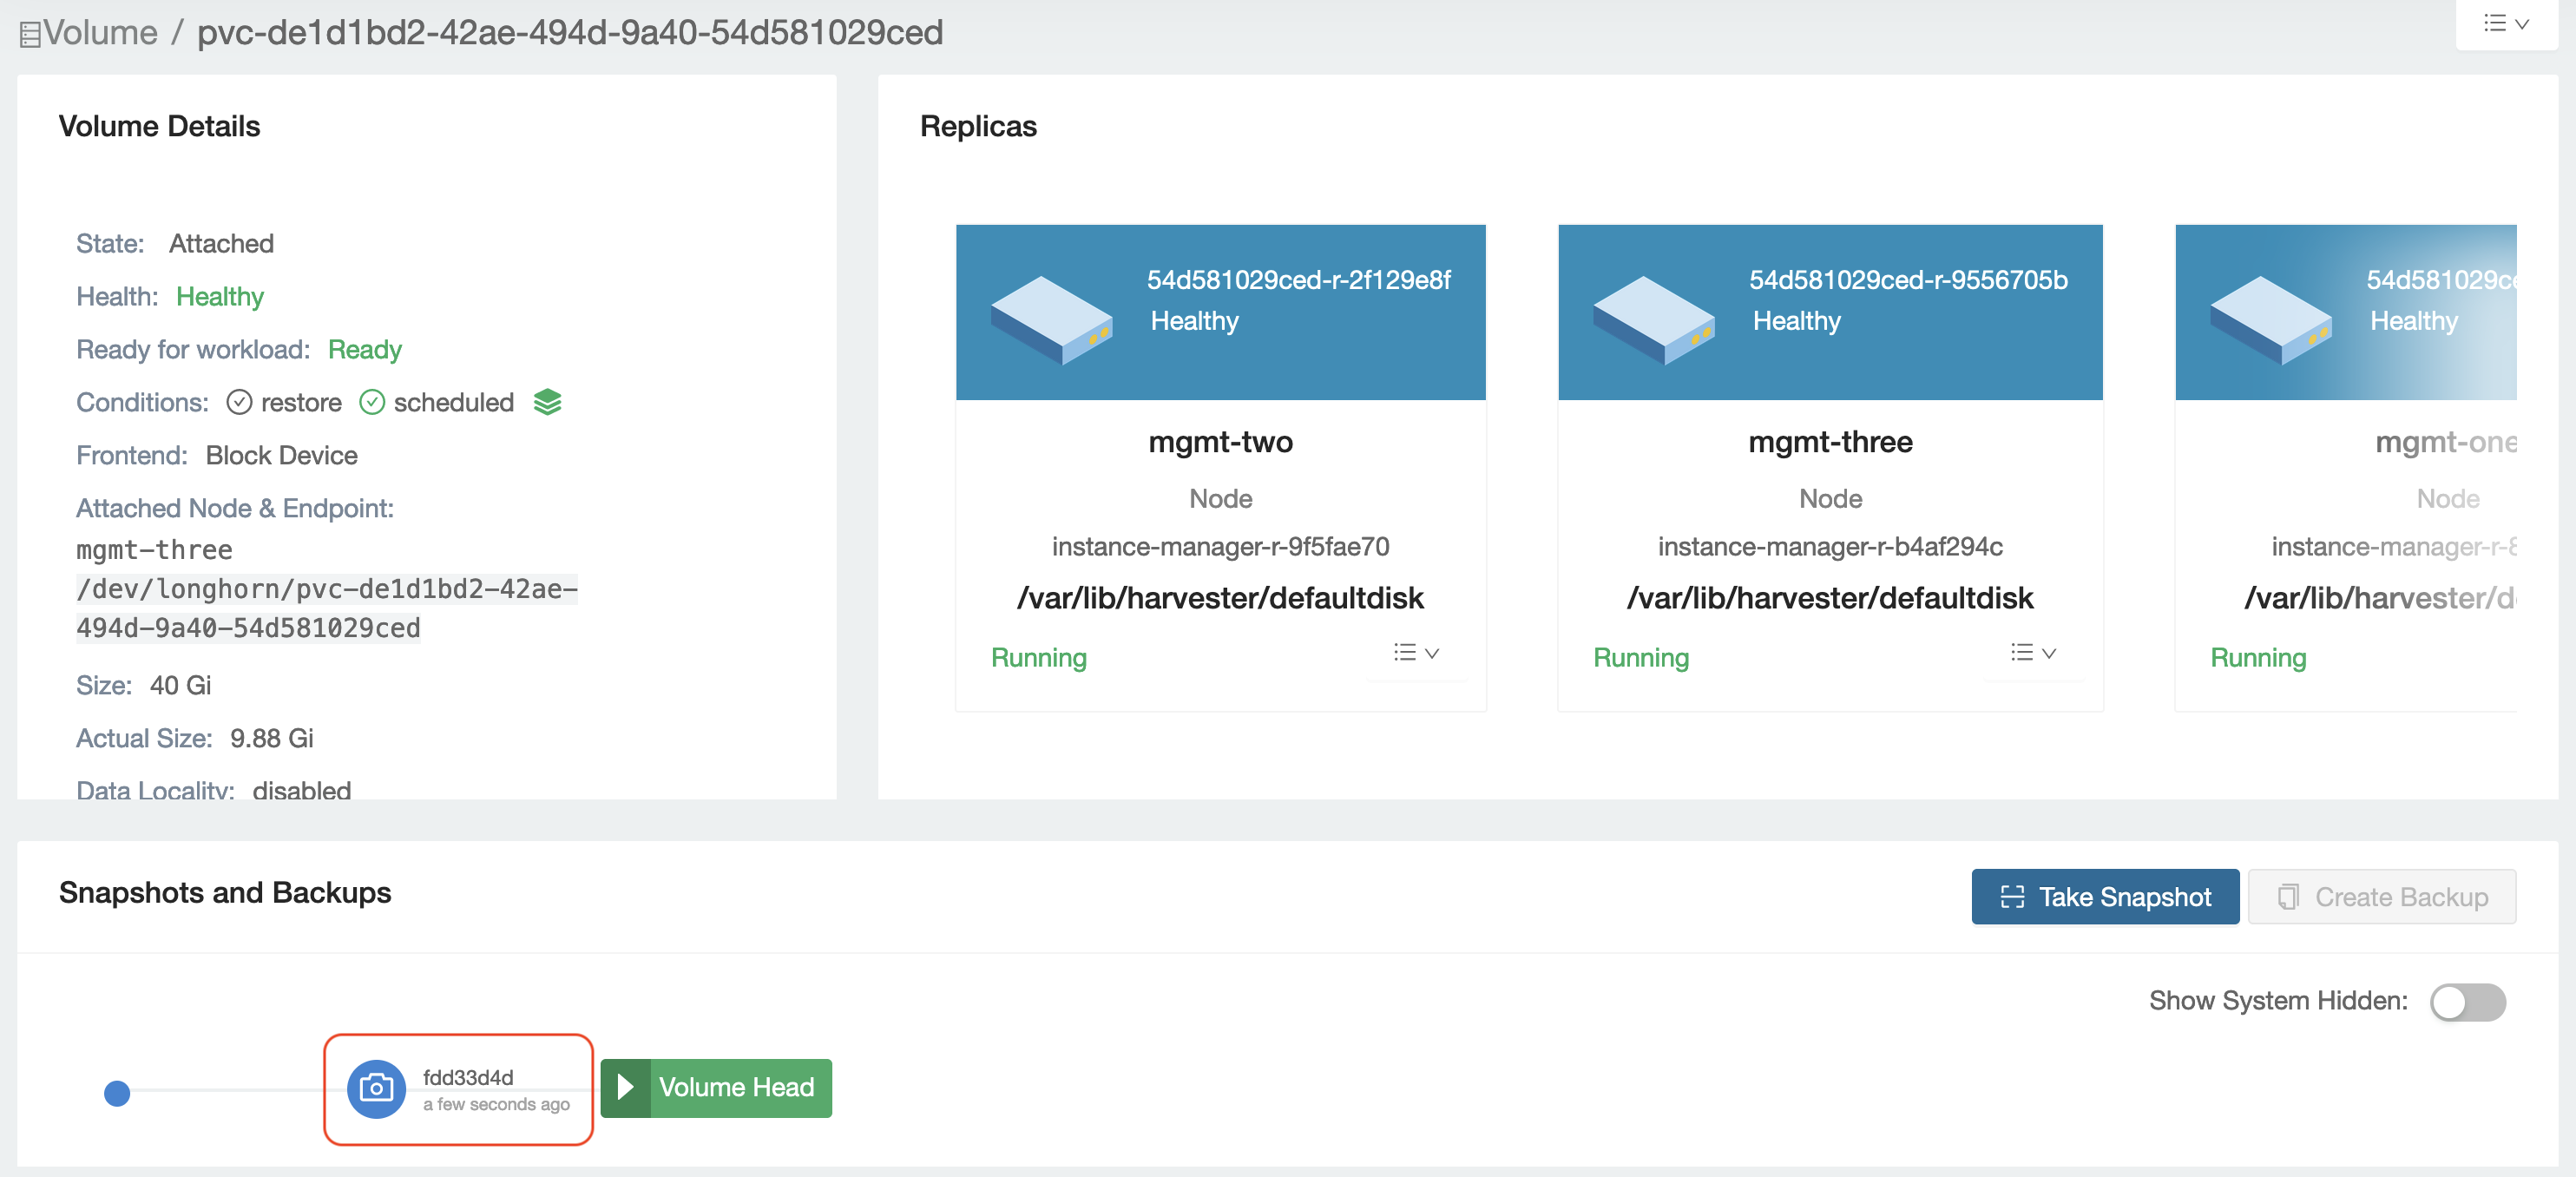
  • Check the volume attached under Volume Details and select Take Snapshot on this volume page.

take snapshot on volume page

  • Confirm that the snapshot is ready.

check the snapshot is ready

Now that you completed the volume backup, you need to scan and repair the root filesystem.

Scanning the root filesystem and repairing

This section will introduce how to scan the filesystem (e.g., XFS, EXT4) using related tools.

Before scanning, you need to know the filesystem's device/partition.

  • Identify the filesystem's device by checking the major and minor numbers of that device.
  1. Obtain the major and minor numbers from the listed volume information.

    In the following example, the volume name is pvc-ea7536c0-301f-479e-b2a2-e40ddc864b58.

    harvester-node-0:~ # ls /dev/longhorn/pvc-ea7536c0-301f-479e-b2a2-e40ddc864b58 -al
    brw-rw---- 1 root root 8, 0 Oct 23 14:43 /dev/longhorn/pvc-ea7536c0-301f-479e-b2a2-e40ddc864b58

    The output indicates that the major and minor numbers are 8:0.

  2. Obtain the device name from the output of the lsblk command.

    harvester-node-0:~ # lsblk
    NAME MAJ:MIN RM SIZE RO TYPE MOUNTPOINTS
    loop0 7:0 0 3G 1 loop /
    sda 8:0 0 40G 0 disk
    ├─sda1 8:1 0 2M 0 part
    ├─sda2 8:2 0 20M 0 part
    └─sda3 8:3 0 40G 0 part

    The output indicates that 8:0 are the major and minor numbers of the device named sda. Therefore, /dev/sda is related to the volume named pvc-ea7536c0-301f-479e-b2a2-e40ddc864b58.

  • You should now know the filesystem's partition. In the example below, sda3 is the filesystem's partition.
  • Use the Filesystem toolbox image to scan and repair.
# docker run -it --rm --privileged registry.opensuse.org/isv/rancher/harvester/toolbox/main/fs-toolbox:latest -- bash

Then we try to scan with this target device.

XFS

When scanning an XFS filesystem, use the xfs_repair command and specify the problematic partition of the device.

In the following example, /dev/sda3 is the problematic partition.

# xfs_repair -n /dev/sda3

To repair the corrupted partition, run the following command.

# xfs_repair /dev/sda3

EXT4

When scanning a EXT4 filesystem, use the e2fsck command as follows, where the /dev/sde1 is the problematic partition of the device.

# e2fsck -f /dev/sde1

To repair the corrupted partition, run the following command.

# e2fsck -fp /dev/sde1

After using the 'e2fsck' command, you should also see logs related to scanning and repairing the partition. Scanning and repairing the corrupted partition is successful if there are no errors in these logs.

Detach and Start VM again.

After the corrupted partition is scanned and repaired, detach the volume and try to start the related VM again.

  • Detach the volume from the Longhorn UI.

detach volume on longhorn UI

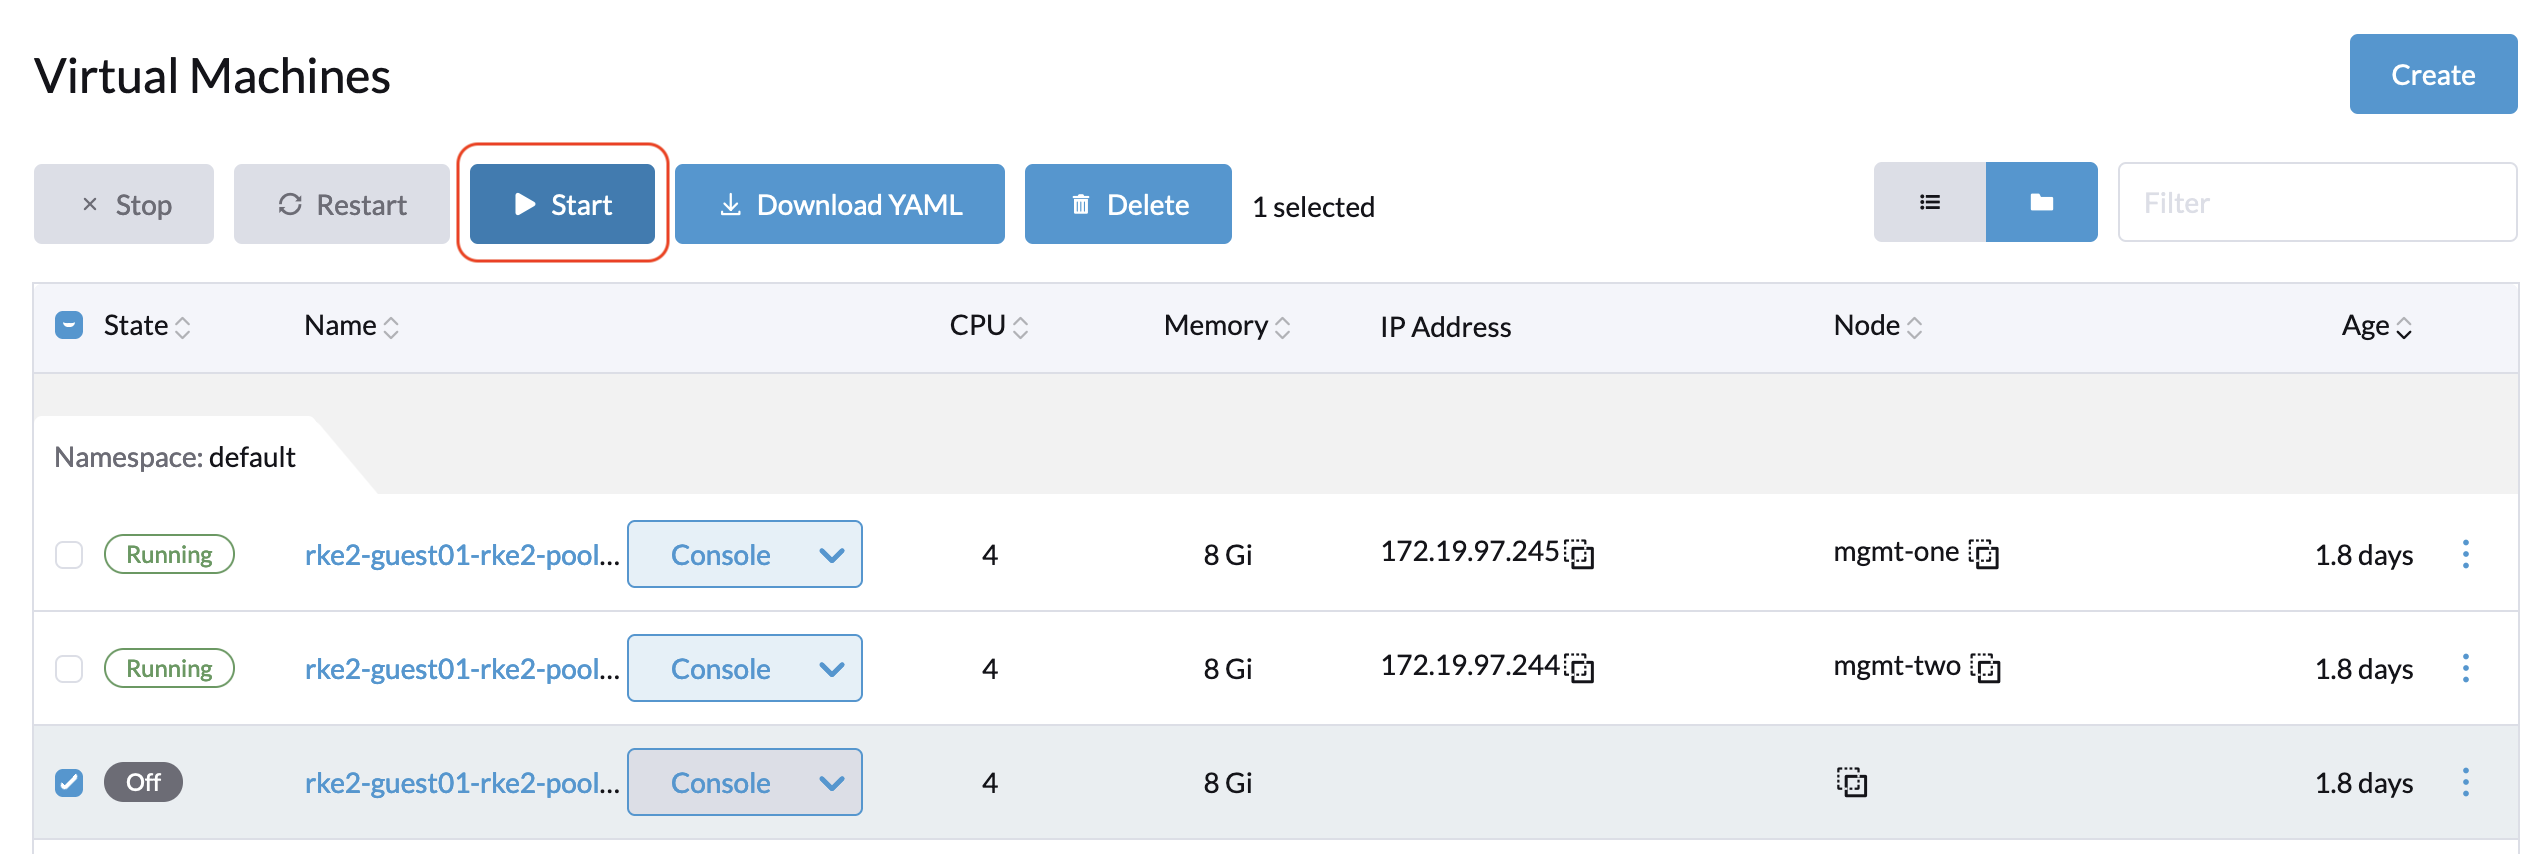
  • Start the related VM again from the Harvester UI.

Start VM again

Your VM should now work normally.

· 2 min read
Kiefer Chang

Harvester replicates volumes data across disks in a cluster. Before removing a disk, the user needs to evict replicas on the disk to other disks to preserve the volumes' configured availability. For more information about eviction in Longhorn, please check Evicting Replicas on Disabled Disks or Nodes.

Preparation

This document describes how to evict Longhorn disks using the kubectl command. Before that, users must ensure the environment is set up correctly. There are two recommended ways to do this:

  1. Log in to any management node and switch to root (sudo -i).
  2. Download Kubeconfig file and use it locally
    • Install kubectl and yq program manually.
    • Open Harvester GUI, click support at the bottom left of the page and click Download KubeConfig to download the Kubeconfig file.
    • Set the Kubeconfig file's path to KUBECONFIG environment variable. For example, export KUBECONFIG=/path/to/kubeconfig.

Evicting replicas from a disk

  1. List Longhorn nodes (names are identical to Kubernetes nodes):

    kubectl get -n longhorn-system nodes.longhorn.io

    Sample output:

    NAME    READY   ALLOWSCHEDULING   SCHEDULABLE   AGE
    node1 True true True 24d
    node2 True true True 24d
    node3 True true True 24d
  2. List disks on a node. Assume we want to evict replicas of a disk on node1:

    kubectl get -n longhorn-system nodes.longhorn.io node1 -o yaml | yq e '.spec.disks'

    Sample output:

    default-disk-ed7af10f5b8356be:
    allowScheduling: true
    evictionRequested: false
    path: /var/lib/harvester/defaultdisk
    storageReserved: 36900254515
    tags: []
  3. Assume disk default-disk-ed7af10f5b8356be is the target we want to evict replicas out of.

    Edit the node:

    kubectl edit -n longhorn-system nodes.longhorn.io node1 

    Update these two fields and save:

    • spec.disks.<disk_name>.allowScheduling to false
    • spec.disks.<disk_name>.evictionRequested to true

    Sample editing:

    default-disk-ed7af10f5b8356be:
    allowScheduling: false
    evictionRequested: true
    path: /var/lib/harvester/defaultdisk
    storageReserved: 36900254515
    tags: []
  4. Wait for all replicas on the disk to be evicted.

    Get current scheduled replicas on the disk:

    kubectl get -n longhorn-system nodes.longhorn.io node1 -o yaml | yq e '.status.diskStatus.default-disk-ed7af10f5b8356be.scheduledReplica'

    Sample output:

    pvc-86d3d212-d674-4c64-b69b-4a2eb1df2272-r-7b422db7: 5368709120
    pvc-b06f0b09-f30c-4936-8a2a-425b993dd6cb-r-bb0fa6b3: 2147483648
    pvc-b844bcc6-3b06-4367-a136-3909251cb560-r-08d1ab3c: 53687091200
    pvc-ea6e0dff-f446-4a38-916a-b3bea522f51c-r-193ca5c6: 10737418240

    Run the command repeatedly, and the output should eventually become an empty map:

    {}

    This means Longhorn evicts replicas on the disk to other disks.

    note

    If a replica always stays in a disk, please open the Longhorn GUI and check if there is free space on other disks.